How to Patch Small and Medium Drywall Holes Like a Pro
Learn step by step how to repair drywall holes up to 6 inches across—using mesh patches or California patches—with the right tools, mud, and finishing techniques.
Difficulty
beginnerTime
1–2 hours (plus drying time)
Est. cost
$20–$50
Tools you'll need
- Drywall keyhole saw
- Drywall knife set (6-inch and 12-inch) — our review
- Sandpaper (120- and 220-grit) and sanding block
- Utility knife — our review
- Pencil and tape measure
- Drywall rasp (optional but handy)
- Drill or drywall screw driver — our review
Materials
- Pre-mixed all-purpose joint compound (1-gallon bucket)
- Drywall mesh patch (self-adhesive, 6x6 inch) or a scrap piece of drywall (for California patch)
- Drywall screws (1-1/4 inch)
- Paper drywall tape (for larger seams)
Step-by-step
- 1
Assess the hole and choose your patch method
Measure the hole. If it's smaller than about 6 inches in any direction, you can use a self-adhesive fiberglass mesh patch. For holes larger than that, a California patch (a piece of drywall cut to fit) gives a stronger repair. For holes under an inch, skip the patch and just use joint compound.
- 2
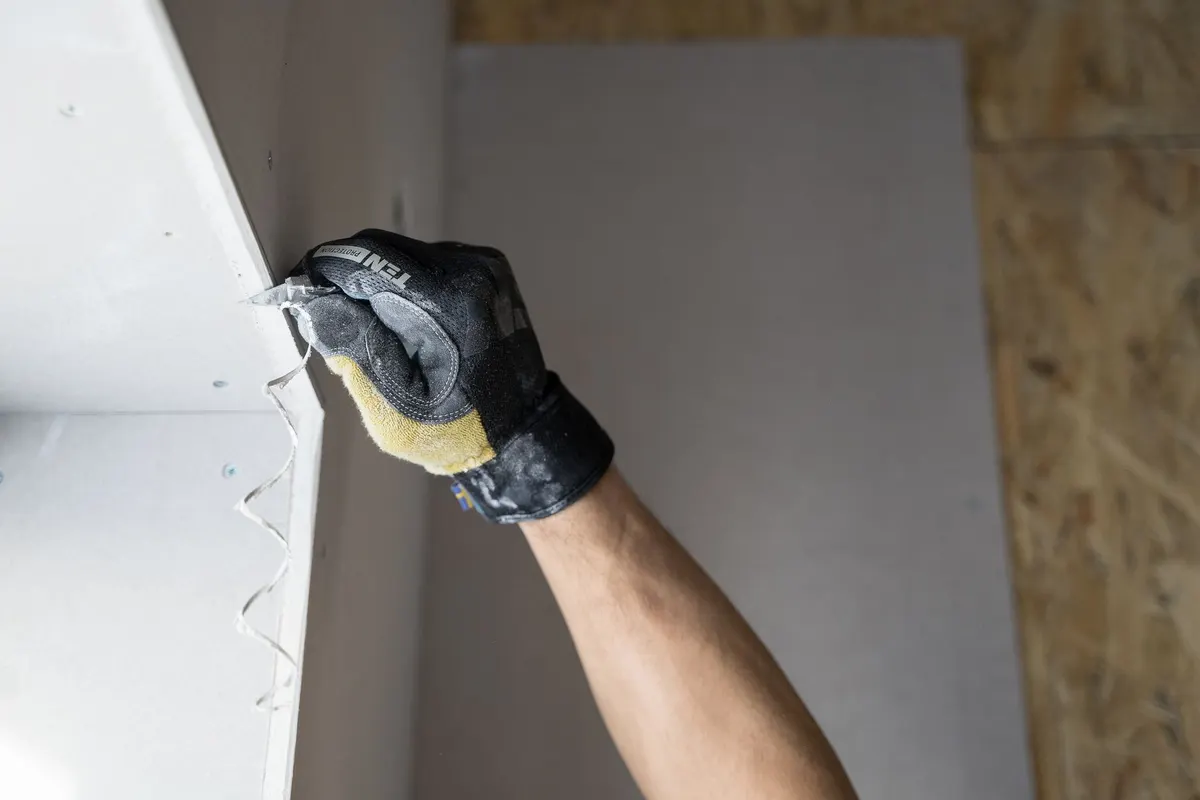
Prepare the hole: clean edges and create a backing
Use a utility knife to cut away any torn or loose drywall paper, creating a clean rectangular or square opening. If using a California patch, cut a scrap piece of drywall slightly larger than the hole, score the back paper, snap, and remove the excess gypsum, leaving a paper flap. For mesh patches, no backing is needed.
- 3
Apply the patch (mesh or California)
For mesh patches: peel off the backing and stick the patch over the hole, centering it. Press firmly onto the wall. For California patches: apply a thin layer of joint compound around the hole, insert the patch so the paper overlaps, then press the paper into the compound. Secure with a couple of drywall screws if needed.
- 4
Apply the first coat of joint compound
Load a 6-inch drywall knife with joint compound and spread it over the patch, feathering the edges outward 2-3 inches beyond the patch. Remove excess so the compound is flat but covers the mesh or paper. Let dry completely (about 2-4 hours depending on humidity).
- 5
Apply second coat and extend the feathering
Once the first coat is dry, lightly sand any ridges with 120-grit sandpaper. Apply a second, wider coat using a 12-inch knife, feathering the edges 6-8 inches out. Keep the compound smooth and thin. Let dry overnight if possible.
- 6
Third coat and final sanding
Apply a third coat if needed to achieve a smooth finish, again feathering wide. Let dry completely. Sand with 220-grit sandpaper or a damp sponge (to minimize dust). Focus on blending the edges to the surrounding wall. Wipe dust with a damp cloth.
- 7
Prime and paint the repaired area
Apply a coat of primer over the patch to seal the joint compound and prevent flashing. Once dry, paint with matching wall paint. Use a small roller or brush to blend into the surrounding area. For best results, paint the full wall from corner to corner.
Planning Your Drywall Patch Repair
Patching small and medium drywall holes is one of the most common home repairs. Whether it's a doorknob dent, a removed wall anchor, or an accidental punch-through, the process is the same: clean the hole, apply a patch, cover with joint compound, sand, and paint. With the right materials and a little patience, you can make the repair virtually invisible.
Before starting, assess the damage. Holes up to about 1 inch can be filled directly with joint compound. For holes up to 6 inches, a self-adhesive fiberglass mesh patch works well. Larger holes require a California patch (a drywall piece cut to fit, with paper backing) or a new piece of drywall screwed to studs. This guide covers holes up to about 6 inches.
Gather your materials: joint compound (pre-mixed all-purpose), drywall knife set (6-inch and 12-inch), self-adhesive mesh patch or drywall scrap, drywall screws (1-1/4 inch), utility knife, sandpaper (120- and 220-grit), primer, and matching paint. A drywall rasp or keyhole saw can help shape the opening.
Mistakes to Avoid
- Skipping edge cleaning: Torn paper edges will cause the patch to bubble or the compound to crack. Always cut clean, straight edges.
- Applying compound too thick: Thick coats take forever to dry and are harder to sand smooth. Multiple thin coats are faster and produce better results.
- Not feathering edges: If you stop the compound abruptly, you'll have a visible bump. Feather each coat wider than the previous one.
- Sanding too aggressively: Sanding through the paper face of the drywall creates a rough area that's difficult to fix. Use fine grit and light pressure.
- Painting without primer: Joint compound is porous; paint will look different on the patch unless you prime first.
Step-by-Step Patch Technique
Start by cutting the damaged area into a clean square or rectangle. This makes patching easier. Use a keyhole saw or utility knife to cut away any loose drywall and paper. Vacuum the dust.
For a self-adhesive mesh patch, peel the backing and center the patch over the hole, pressing firmly onto the wall. The mesh has adhesive backing that holds it in place. No screws are needed for this method, which is ideal for beginners.
For a California patch, cut a drywall scrap 1 inch larger than the hole all around. Score the back paper (not through the front face) and snap the gypsum, peeling away the excess to leave a 1-inch paper border. Spread a thin layer of compound around the hole, insert the patch (paper side out), and press the paper into the compound. You can also drive a drywall screw into the center to hold it in place while the compound sets.
Apply the first coat of joint compound with a 6-inch knife, pressing firmly to fill the mesh and cover the patch. Scrape off excess, leaving a thin layer. Feather the edges 2-3 inches beyond the patch. Let dry completely (2-4 hours).
For the second coat, switch to a 12-inch knife. Lightly sand any ridges with 120-grit sandpaper. Apply a wider coat, feathering 6-8 inches out. Keep the compound smooth and thin. Let dry overnight for best results.
A third coat may be necessary to achieve a seamless finish. Use the 12-inch knife and feather even wider. When dry, sand with 220-grit sandpaper or a damp sponge (which generates less dust). Wipe the area clean.
Finally, apply a coat of primer. Once dry, paint to match the wall. Using a 4-inch roller or a brush, blend the paint into the surrounding area. For a perfect match, consider painting the entire wall.
Safety
- Wear safety glasses when cutting or sanding drywall; dust and gypsum particles can irritate eyes.
- Use a dust mask or respirator when sanding to avoid inhaling joint compound dust, which can contain silica.
- Work in a well-ventilated area, especially when using primer and paint; open windows or use a fan.
- Keep utility knives and drywall saws sharp; dull tools require more force and can slip. Always cut away from your body.
- Store joint compound and paint according to manufacturer's instructions; keep out of reach of children and pets.
- When using a ladder to reach high holes, follow ladder safety: set on level ground, lock spreaders, and never stand on the top rung.
Advertisement
Frequently asked questions
- How big of a hole can I patch with mesh tape?
- Self-adhesive mesh patches work well for holes up to about 6 inches in diameter. Larger holes need a California patch or a new piece of drywall screwed to backing studs.
- Do I need to use drywall primer before painting?
- Yes, always prime the repaired area. Joint compound is porous and will 'flash' (look different) if painted directly. A quality primer seals the compound and ensures an even paint finish.
- Why is my patch cracking?
- Cracking usually means the coats were too thick, the patch wasn't fully covered, or the compound dried too fast. Apply thin coats and let each dry thoroughly. For mesh patches, ensure compound fully penetrates the mesh.
- Can I patch a hole without tape or backing?
- Holes under 1 inch can be filled with just joint compound. For larger holes, the patch provides structure; without it, the compound will sag or crack.
- How long should I wait between coats?
- Follow the manufacturer's instructions. Generally, all-purpose compound dries in 2-4 hours per thin coat, but overnight drying is safer for thicker coats or in humid conditions.