How to Build Wall-Mounted Floating Shelves with Hidden Brackets
Build sleek floating shelves on hidden steel brackets that hold up to 50 lbs. Covers wood selection, bracket layout, routing, and stud-mounting.
Difficulty
intermediateTime
3–5 hours
Est. cost
$40–$80
Tools you'll need
- Cordless drill driver — our review
- Circular saw or miter saw
- Router with 1/2-inch straight bit (or 3/4-inch dado stack on table saw) — our review
- Tape measure
- Level (4-foot or longer)
- Stud finder
- Clamps (at least two bar clamps)
Materials
- One 8-foot 1x10 or 1x12 board (select pine, poplar, or hardwood) per shelf
- Two floating shelf brackets (heavy-duty steel, rated min 50 lbs each) per shelf
- Two 3-inch lag bolts with washers per bracket (for stud mounting)
- Wood glue
- 80- and 120-grit sandpaper
- Wood finish (polyurethane, oil, or paint) – optional
Step-by-step
- 1
Select and dimension your wood
Choose a straight, knot-free board at least 1 inch thick (actual 3/4 inch) and 10 to 12 inches wide. Cut the shelf to your desired length, typically 36, 48, or 60 inches. For a 48-inch shelf, cut the board to 48 inches. Ensure both ends are square; use a speed square and circular saw or miter saw for clean cuts. Label the top face so you do not rout the wrong side.
- 2
Route the dado for the bracket
Measure the thickness of your bracket's steel arm (typically 1/4 to 1/2 inch). Set your router depth to match that thickness, plus about 1/16 inch for a snug but not tight fit. Clamp the shelf face-down. Using the bracket as a guide, mark the start and end points of the dado on the bottom of the shelf. Route a groove 3/4 inch deep and the width of the bracket's arm, stopping 2 inches from the front edge (to hide the bracket completely). If using a table saw with a dado stack, set the blade height to 3/4 inch and make multiple passes. Clean up the slot with a chisel if needed.
- 3
Drill access holes for the bracket screws
Position the bracket into the routed dado so its back plate is flush with the back edge of the shelf. Through the bracket's mounting holes, mark the shelf for pilot holes. Remove the bracket and drill 1/4-inch pilot holes through the shelf, perpendicular to the back edge. Countersink the holes on the back face so screw heads will sit flush against the wall. The holes should be large enough to allow the mounting screws to pass through without binding. Reinsert the bracket and test-fit with the supplied screws; the bracket should sit fully into the dado with no gaps.
- 4
Install the brackets into the shelf
Apply a thin layer of wood glue inside the dado. Slide the bracket into the slot, ensuring the back plate is flush with the back edge. Insert the screws from the back of the shelf through the pilot holes and tighten them into the bracket's threaded holes. Wipe off any excess glue. The bracket is now permanently attached to the shelf. Repeat for the second bracket, spacing them evenly (e.g., 16 inches apart for a 48-inch shelf). Let the glue cure for at least 30 minutes before proceeding.
- 5
Locate and prepare the wall mounting points
Use a stud finder to locate two wall studs that align with your bracket positions. If the stud spacing does not match your bracket spacing, adjust the bracket positions on the shelf (as long as they are still within the dado). Mark the stud centers with a pencil. Hold the shelf against the wall at your desired height, level it, and mark the wall through the bracket's mounting holes. Remove the shelf and drill 1/4-inch pilot holes into the studs at the marked locations. If you are unable to hit studs, use heavy-duty toggle bolts rated for at least 75 lbs each.
- 6
Mount the shelf to the wall
Hold the shelf back against the wall, aligning the bracket holes with the pilot holes in the studs. Insert 3-inch lag bolts with washers into each hole and tighten them with a socket or driver, but do not overtighten—snug is enough. Check the shelf with a level one last time and adjust by loosening or tightening bolts slightly if needed. The shelf should feel rock-solid with no movement. If using toggle bolts, follow the manufacturer's instructions for insertion and tightening.
- 7
Fill and finish the shelf
If desired, fill the small gap where the bracket enters the shelf with wood filler or a matching putty, then sand flush with 120-grit sandpaper. Sand the entire shelf starting with 80-grit to smooth rough edges, then 120-grit for a final finish. Wipe away dust with a tack cloth. Apply your choice of finish: wipe-on polyurethane for a natural look, paint for color, or boiled linseed oil for a matte sheen. Allow the finish to cure fully (at least 24 hours) before loading the shelf.
Planning Your Floating Shelves
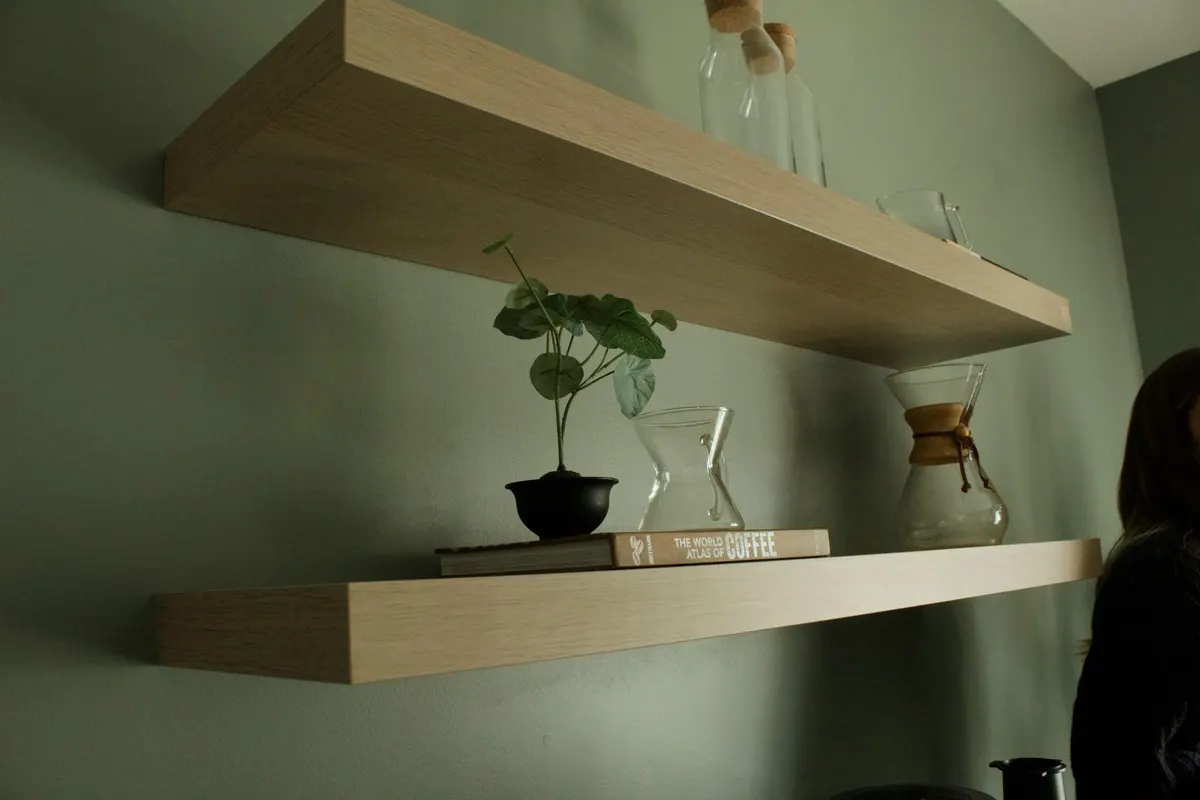
Floating shelves create a clean, modern look by hiding the support brackets entirely inside the shelf itself. The key to success is precise routing of the dado (the recess that accepts the bracket) and secure attachment to wall studs. This project assumes you have basic woodworking tools and some experience with a router. The finished shelves can hold books, decor, or kitchen items when properly anchored.
Start by deciding the shelf length, depth, and number. A typical shelf is 48 inches long by 10 inches deep, using a 1x10 board. For deeper shelves, use a 1x12. The wood thickness should be at least 3/4 inch (actual) to provide enough material for a 1/2-inch deep dado without weakening the shelf. Hardwoods are stiffer and less prone to sag over long spans, but select pine or poplar works fine for most applications.
Measure your wall space and mark the desired shelf height. Account for the thickness of the shelf—if you want the top surface at 60 inches, subtract 3/4 inch. Use a level to draw a reference line. Locate wall studs with a stud finder and mark their centers. For a 48-inch shelf spanning two studs at 16 inches on center, the brackets should be placed 16 inches apart from each other, centered on the studs. If your studs are 24 inches apart, adjust bracket spacing accordingly or choose a shelf length that spans three studs.
Cutting and Routing the Shelf
Cut your shelf board to length using a miter saw or circular saw with a guide. Ensure both ends are square. Sand the cut edges smooth with 120-grit sandpaper. Now determine the bracket position: slide the bracket into the dado location you plan to route. The bracket's steel arm should be centered in the shelf's thickness. Mark the starting point of the dado 2 inches from the front edge (so the bracket is hidden) and the ending point at the back edge of the shelf.
Clamp the shelf face-down to a workbench. Install a 1/2-inch straight bit in your router and set the depth to 3/4 inch—this will create a groove deep enough to fully embed the bracket. Test the depth on a scrap piece first. If your bracket arm is 1/4 inch thick, a 3/4-inch deep dado leaves 1/2 inch of wood above the bracket, which is plenty for strength. Make multiple passes, starting shallow and increasing depth by 1/4 inch each pass, to prevent tear-out. Use a straight edge clamped as a guide to keep the router path straight. When complete, clean out the groove with a chisel.
For a dado that spans the full width of the shelf (if using a table saw), set the blade height to 3/4 inch and make multiple passes, moving the fence 1/8 inch each time. Clean up the bottom with a chisel.
Installing the Brackets into the Shelf
Apply a thin, even layer of wood glue inside the routed dado. Insert the bracket and ensure its back plate is flush with the back edge of the shelf. Using the bracket's mounting holes as a guide, drill 1/4-inch pilot holes through the shelf from the back face. Countersink these holes so the screw heads sit flush. Insert the provided screws from the back of the shelf and tighten them into the bracket. Do not overtighten—just snug. Wipe away any glue squeeze-out immediately. Repeat for the second bracket.
Allow the glue to cure for at least 30 minutes. Test the fit by holding the shelf against the wall; the brackets should sit flat against the drywall.
Mounting the Shelf to the Wall
Mark the bracket locations on the wall from the back plate holes. Use a stud finder to confirm stud positions. Drill 1/4-inch pilot holes into the studs 2.5 inches deep (for a 3-inch lag bolt). If the bracket holes do not align with studs, you have two options: reposition the brackets on the shelf (if within the dado) or use toggle bolts in drywall. For toggle bolts, drill a 5/8-inch hole and insert the toggle, then screw the bracket onto the toggle bolt.
Hold the shelf in place and insert the lag bolts with washers through the bracket holes into the pilot holes. Tighten using a socket or impact driver until snug. The shelf should feel solid with no movement. Check level with a level and adjust by loosening one side slightly if needed.
Finishing the Shelf
If you left a small gap where the bracket enters the shelf, fill it with wood filler and sand flush. Sand the entire shelf with 120-grit sandpaper. Wipe clean. Apply finish: polyurethane for durability, paint for color, or oil for a natural look. Let cure fully before loading.
Common Mistakes to Avoid
- Routing the dado too shallow: The bracket must sit completely inside the shelf so it is invisible. Double-check depth with a test piece.
- Skipping pilot holes in studs: Lag bolts can split drywall or stud if driven without a pilot hole. Always pre-drill.
- Over-tightening lag bolts: This can strip the hole or crack the wood shelf. Snug is sufficient.
- Not checking for level after mounting: Walls are rarely perfectly straight. Use shims behind the bracket if necessary.
- Using brackets rated for less weight than you need: Always sum the ratings of both brackets and leave a safety margin.
Safety
Wear safety glasses and hearing protection when routing, cutting, or drilling. Keep hands clear of router bits and saw blades. Clamp workpieces securely—routers can grab and throw loose material. When using a router, always move in the direction that prevents climb cutting (typically left to right). Unplug tools before changing bits or blades. When mounting shelves, ensure your ladder is stable and you have a helper if the shelf is long. Never overload a shelf beyond the bracket rating; distribute weight evenly. Keep tools and materials away from children and pets during construction.
Advertisement
Frequently asked questions
- How much weight can these floating shelves hold?
- When properly installed into studs with 3-inch lag bolts, a single shelf bracket rated for 50 lbs each can support 100 lbs per shelf (using two brackets). Always check the bracket manufacturer's rating and ensure your wall anchors are appropriate for the wall type (drywall alone will not hold significant weight).
- Can I build these shelves without a router?
- Yes. You can cut the dado for the bracket using a table saw with a dado stack set to 3/4 inch depth, making multiple passes to reach the needed width. If you do not have a table saw, you can chisel out the groove by hand, though it will be more labor-intensive and less precise. For a bracket with a thin arm, a circular saw set to depth can also work, but cleanup with a chisel will be needed.
- What type of wood is best for floating shelves?
- Select pine or poplar is excellent for painted shelves because of its smooth grain and stability. For a natural stain finish, choose oak, maple, or walnut. Avoid pressure-treated lumber, as it can warp significantly after installation. Always use a straight, kiln-dried board to minimize movement after mounting.
- How do I ensure the shelf is level and square?
- Use a 4-foot level both along the length of the shelf and across its face when marking the wall. Check that the wall is not significantly out of plumb; if it is, you may need to shim the bracket's back plate so the shelf sits level. Also ensure the back edge of the shelf is cut square — any angle will be visible when mounted.
- Can I mount these shelves on a wall without studs?
- Yes, but only for lightweight items (under 20 lbs total). Use heavy-duty toggle bolts rated for at least 75 lbs each and ensure the drywall is in good condition (not crumbling or old). For any significant weight, always anchor into studs. If studs are not where you need them, consider adding a piece of 3/4-inch plywood backing behind the drywall before finishing the wall.