How to Install a Ceiling Light Fixture: Step-by-Step Guide
Replace an outdated ceiling light with a new fixture safely. Covers turning off power, wiring, mounting, and testing for a professional finish.
Difficulty
intermediateTime
1–2 hours
Est. cost
$40–$80
Tools you'll need
- Non-contact voltage tester
- Wire strippers
- Flathead and Phillips screwdrivers
- Cordless drill driver — our review
- Wire nuts (assorted sizes)
- Insulated pliers
- Ladder or step stool
Materials
- New ceiling light fixture (with mounting bracket and screws)
- Wire nuts (as needed, if not included)
- Electrical tape
- Screws for mounting bracket (if not included)
Step-by-step
- 1
Turn Off Power and Verify It Is Off
Go to your breaker panel and turn off the circuit that supplies the existing light. Switch the wall switch on and off to be sure the light does not come on. Then use a non-contact voltage tester—hold it against the wire or screw terminal inside the junction box—and confirm it indicates no voltage. Never skip this step; treat every wire as live until you have verified it is dead.
- 2
Remove the Old Fixture
Unscrew the old fixture's canopy or cover, exposing the wiring and mounting bracket. Note how the wires are connected: typically a black (hot) wire, a white (neutral) wire, and a bare copper or green ground wire. Disconnect the wire nuts joining them, and untwist any taped connections. Support the fixture while you do this so it does not pull on the wires. Remove the old mounting bracket if a new one is included with your fixture.
- 3
Assemble the New Fixture's Mounting Bracket
Most flush-mount or semi-flush fixtures come with a metal mounting bracket that screws into the junction box. Use the included machine screws (or the ones from the old bracket) to secure the bracket to the box—make sure it is level. If your fixture uses a threaded nipple, screw the nipple into the bracket first. For heavy fixtures, ensure the box is rated for the weight; if not, install a fan-rated box.
- 4
Prepare the Fixture Wires
If the fixture wires are not stripped, use wire strippers to remove about 3/4 inch of insulation from the ends of the black, white, and ground wires. If the fixture has a bare copper ground wire, that is fine; if it has a green insulated wire, treat it as ground. Twist the stranded fixture wires (or solid if your fixture has solid) to prevent fraying.
- 5
Connect the Wiring
Connect the wires with wire nuts: join the black (hot) fixture wire to the black (hot) supply wire, the white (neutral) fixture wire to the white (neutral) supply wire, and the ground wire to the ground wire (or green screw in the box). Twist each wire nut clockwise until tight, then gently tug each connection to confirm it is secure. Wrap a strip of electrical tape around each wire nut for extra security.
- 6
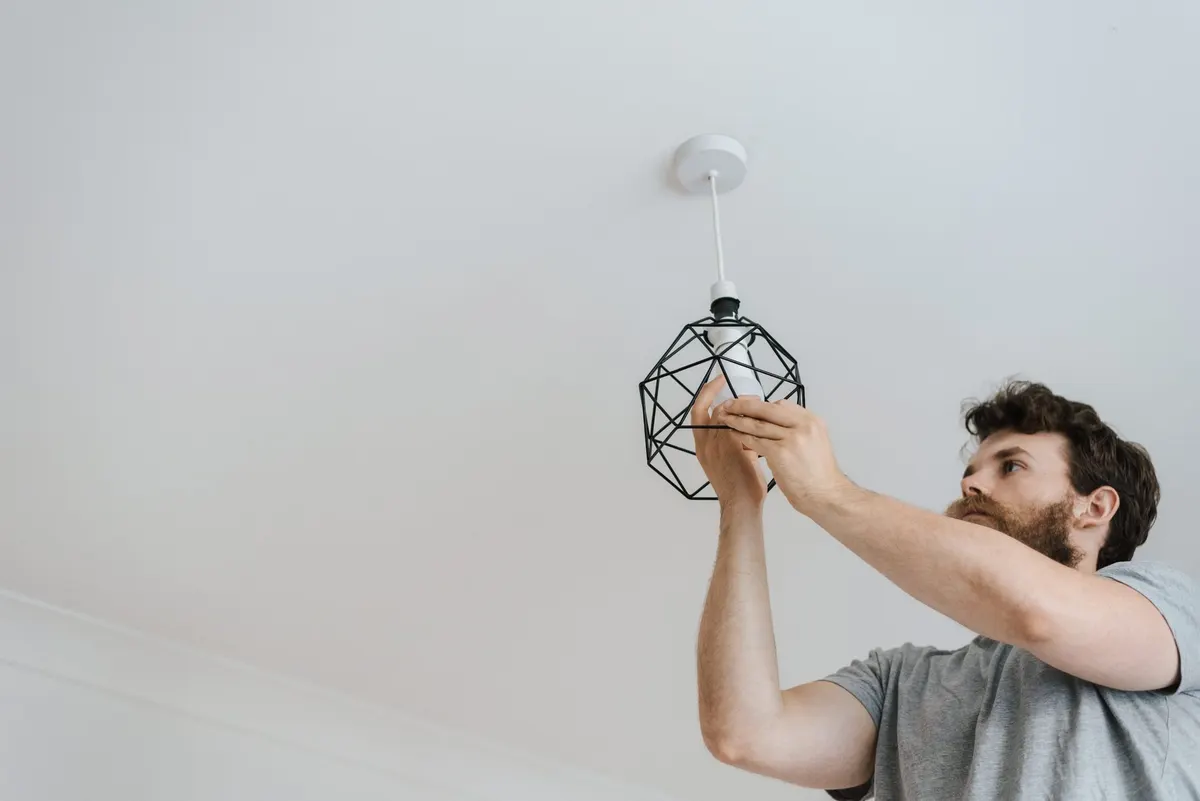
Attach the Fixture Canopy
Carefully tuck the wires into the junction box, making sure no wire nuts are touching metal edges. Position the canopy over the bracket and secure it with the provided screws or finial. Tighten evenly so the canopy sits flush against the ceiling without gaping.
- 7
Install Bulbs and Test
Install the light bulbs recommended by the fixture manufacturer (typically 60W max per socket if incandescent, or the rated LED equivalent). Turn the circuit breaker back on and flip the wall switch. If the light works, congratulations—you are done. If it does not, turn off the power and double-check your connections.
Planning Your Light Fixture Installation
Replacing a dated ceiling light with a modern fixture is one of the most rewarding DIY projects—it quickly transforms a room's look and feel. But because you are working with household electrical wiring, careful planning and strict adherence to safety rules are non-negotiable. Before you buy anything, confirm that the new fixture is compatible with your existing junction box. Standard round or octagonal boxes are fine for most flush-mount fixtures. If your box is shallow (less than 1/2 inch deep) or the fixture is heavy, you may need to upgrade to a fixture-rated box. Measure the ceiling clearance: for a chandelier or pendant, you need at least 7 feet of clearance above the floor; for a flush mount, any ceiling works.
Also consider the bulb type and wattage. LED bulbs are cooler and more energy-efficient than incandescent and often last years. Many new fixtures come integrated LEDs; if not, check the maximum wattage rating. A typical flush-mount with two or three sockets might be rated for 60W per socket, so three 60W incandescents equals 180W—consider that when calculating load, or just use 8–12W LEDs for comparable brightness.
Tools and Materials You Will Need
Gather everything before you start. You will need:
- Non-contact voltage tester (essential)
- Wire strippers
- Flathead and Phillips screwdrivers
- Cordless drill driver (optional for mounting bracket)
- Wire nuts (sizes appropriate for your wire gauge)
- Insulated pliers (for twisting wires)
- Electrical tape
- Ladder or step stool
Materials include the new fixture (with its mounting hardware), spare wire nuts if those included are flimsy, and possibly a new junction box if replacing an old plastic or worn box.
Safety First
IMPORTANT: Turn off power at the breaker before any work. Do not rely solely on the wall switch—someone might accidentally flip it back on. Verify the circuit is dead with a non-contact voltage tester, touching it to each wire and the screw terminals. If the tester beeps or lights, the circuit is still live. Also test that your tester works by checking it on a known live circuit first. If you are not comfortable working with wiring or your home has aluminum wiring, consult a licensed electrician. Many jurisdictions require a permit for electrical work; check local codes.
Common Mistakes to Avoid
The biggest mistake is assuming the power is off without testing. Always test. Another common error is miswiring the hot and neutral connections, which can leave the fixture always hot or create a shock hazard. Connect black to black and white to white, and ground to ground. When tucking wires into the box, do not pinch them with the canopy; this can cause shorts. Over-tightening screws on the mounting bracket can strip the drywall or box; snug is enough. Finally, using a bulb with a higher wattage than the fixture is rated for can overheat wiring—stick to the manufacturer's recommendation.
Step-by-Step Instructions
Step 1: Turn Off Power and Verify
Locate the correct breaker and switch it off. Even if the light does not come on, you cannot be sure the power is off until you test. Use your voltage tester on the wires inside the box. No beep means safe.
Step 2: Remove the Old Fixture
Unscrew the canopy and carefully disconnect the wire nuts. If the wires are old and brittle, trim the ends and re-strip them for a clean connection. Remove the old bracket.
Step 3: Install the New Bracket
Attach the supplied bracket to the junction box. Use a level to make sure it is straight—a crooked fixture is annoying to fix later. If your fixture uses a threaded nipple, screw it into the bracket now.
Step 4: Prepare Fixture Wires
Strip about 3/4 inch of insulation from each fixture wire. Twist stranded wires to prevent fraying.
Step 5: Connect Wiring
Match colors: black to black (hot), white to white (neutral), ground to ground. Use appropriately sized wire nuts—typically a gray or blue nut for 14-12 gauge. Twist each nut firmly, then pull each connection to ensure it is secure. Wrap with electrical tape for extra protection.
Step 6: Attach the Canopy
Tuck wires neatly into the box, avoiding pinching. Align the canopy and secure it with screws or a finial. Tighten evenly.
Step 7: Install Bulbs and Test
Insert the appropriate bulbs. Turn the breaker back on and flip the switch. If the light works, rejoice—you have successfully installed your new fixture. If not, turn off power, check connections, and ensure the bulb is not loose or faulty.
Troubleshooting
If the light does not turn on, the most likely causes are a loose wire connection, a bad bulb, or a tripped breaker. Check each wire nut is tight and the bulbs are screwed in fully. If the breaker tripped, you may have a short circuit—inspect wiring for exposed conductor or metal contact.
Final Thoughts
Installing a ceiling light is a beginner-to-intermediate project that takes about an hour for a simple flush mount. The satisfaction of flipping the switch and seeing your new fixture glow is well worth the effort. Always prioritize safety, and when in doubt, call a licensed electrician.
Advertisement
Frequently asked questions
- Can I install a ceiling light if the junction box is plastic?
- Yes, plastic junction boxes are common for light fixtures and are acceptable as long as they are rated for the weight of the fixture. Check the box label: it will specify a weight limit (usually 50 lbs for standard boxes). For heavier fixtures, you need a metal box rated for the weight or a fan-rated box.
- What if my ceiling has no junction box?
- You must install a junction box before hanging any light fixture. Use a remodel (old-work) box that fastens directly to the drywall. Ensure it is securely mounted and rated for the fixture weight. Running new wire from a nearby switch or outlet may be needed; if you are unsure, hire a licensed electrician.
- Why does my light fixture have a green screw but no ground wire?
- The green screw is the grounding point on the fixture's mounting bracket or metal body. Wrap the bare supply ground wire around the green screw clockwise, then tighten the screw, and connect any remaining ground wire to the fixture's ground lead with a wire nut. This ensures the fixture is properly grounded.
- Can I use dimmer bulbs in a non-dimmable fixture?
- You can physically install dimmer-rated bulbs in a standard switch fixture, but they will operate at full brightness and may have a shorter lifespan. However, never install a dimmer switch for a fixture that does not explicitly support dimming, as this can cause flickering or damage.
- My old fixture has two black wires and no white—how do I connect it?
- In some older switch loops, the white wire may be used as a hot wire. This is not standard and may violate current code. It is safest to consult an electrician or check local codes. In general, if the old wiring is confusing, do not guess—call a professional.